Notiz
Lab 1: How To Acquire Data
Task 1: Collecting Volatile Data Manually
Evidence acquisition is one of the most important tasks to be done in order to start your investigation. Since part of computers’ nature is that data is not always consistent, especially those that are volatile, we need to start our data collection process by acquiring the volatile evidence first.
For this task, create a directory to store all acquired evidence, and gather the following data:
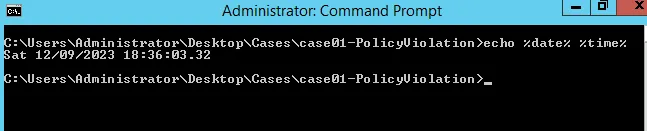
- Date and Time
  For PS
  >> date
  For cmd
  >> echo %date% %time%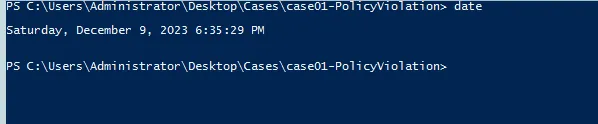
- Currently running tasks
  >> tasklist
  For listing out with modules use:
  >> tasklist /m

  Listing the services used on task:
  >> tasklist /svc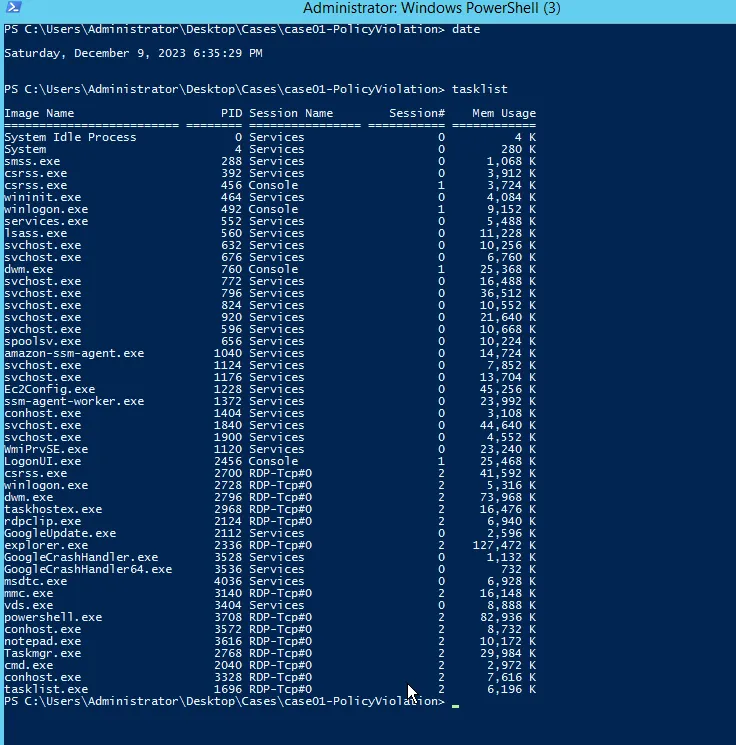
- Current network connections
For both PS and cmd
>> netstat -ano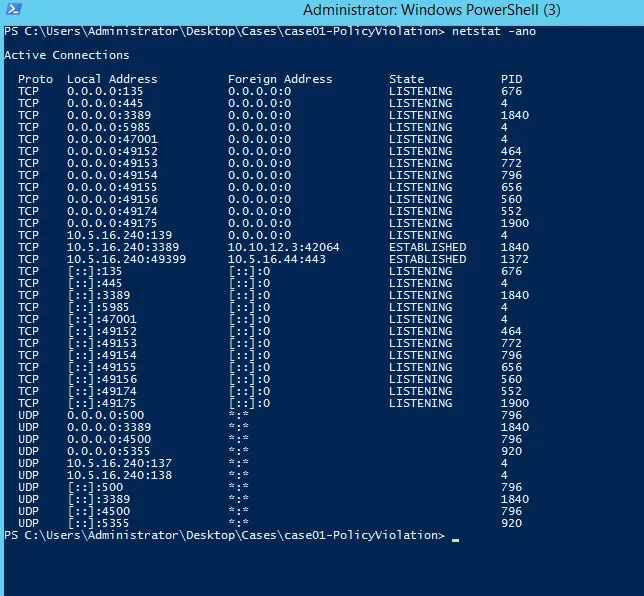
- ARP Cache
>> arp -a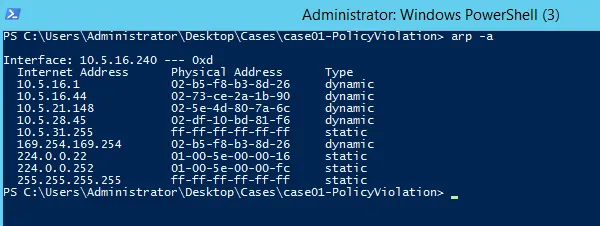
- Network Configurations
ipconfig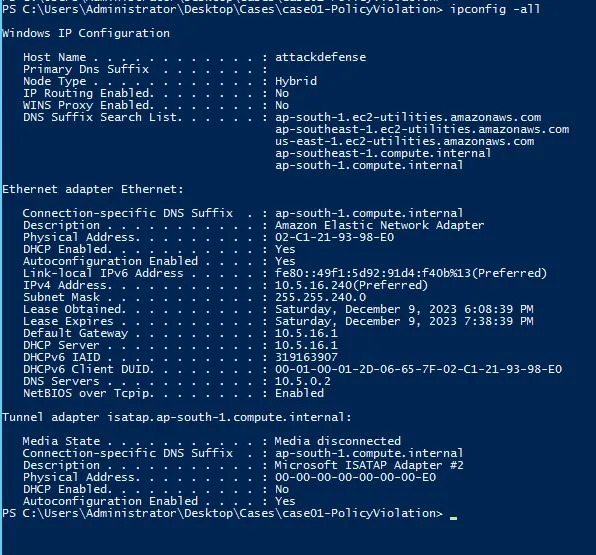
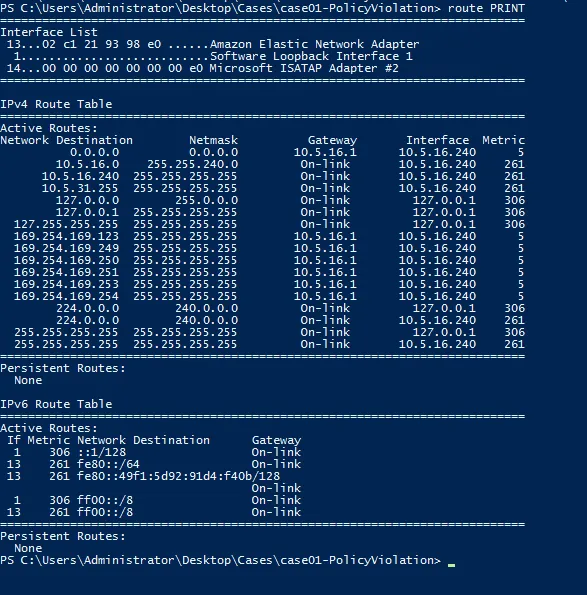
- DNS and Routing Table
  >> ipconfig /displaydns

  For routing table\
  >> route PRINT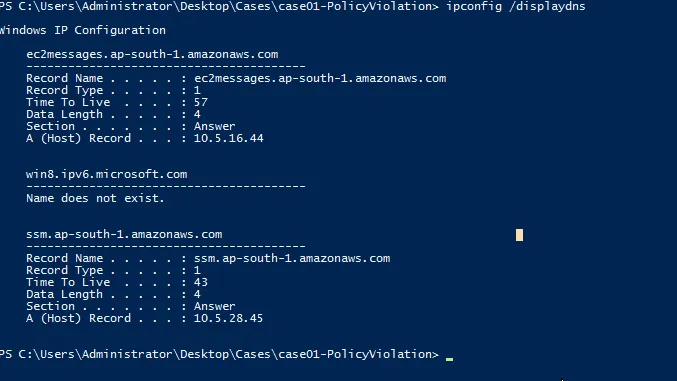
-
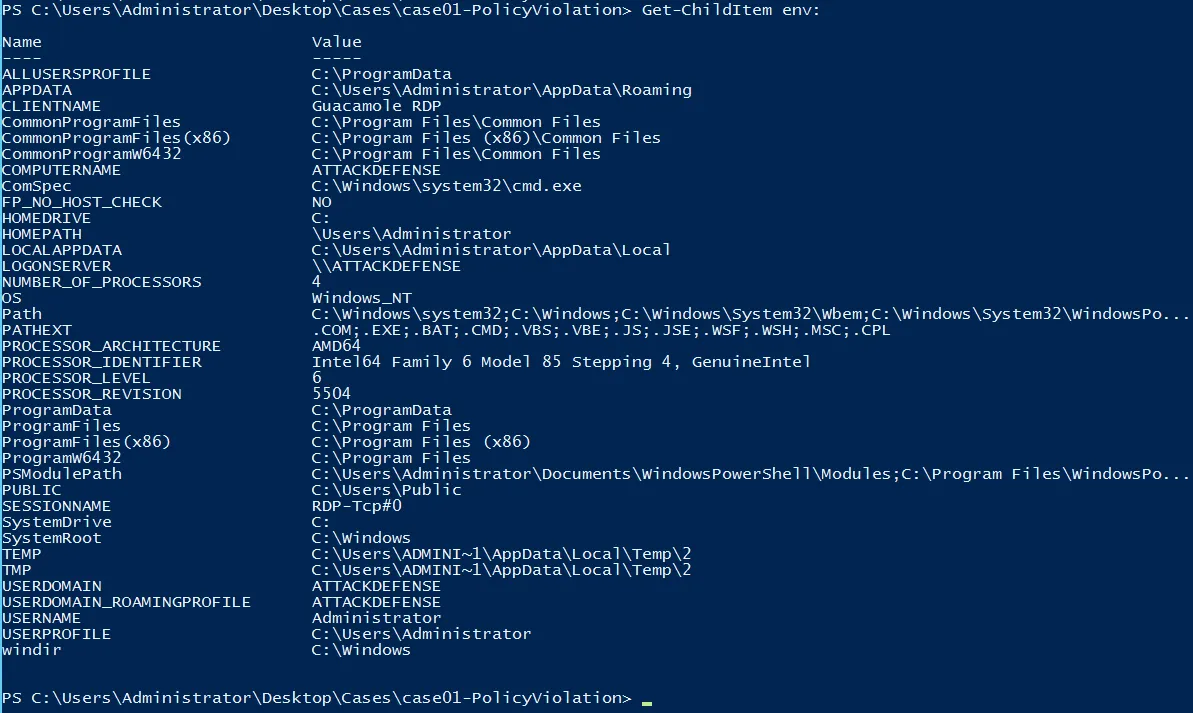
System Variables
This is slightly different from cmd to PS
      For cmd
      >> set

      For PS
      >> Get-ChildItem env: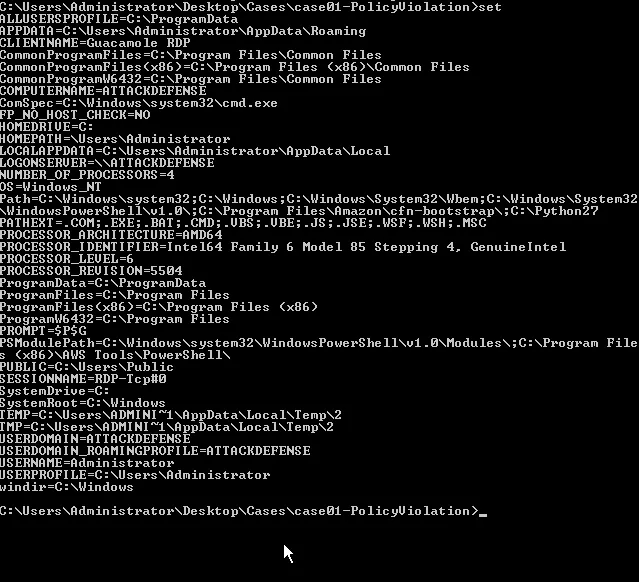
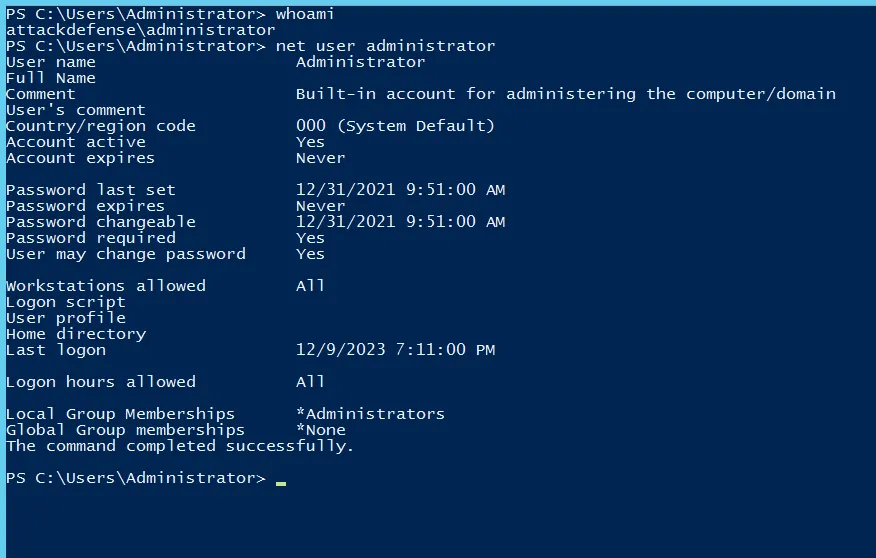
- User Information
This can be done according to user choice
  For cmd
  >> net user %username%

  For PS
  >> whoami
  >> net user [output of whoami]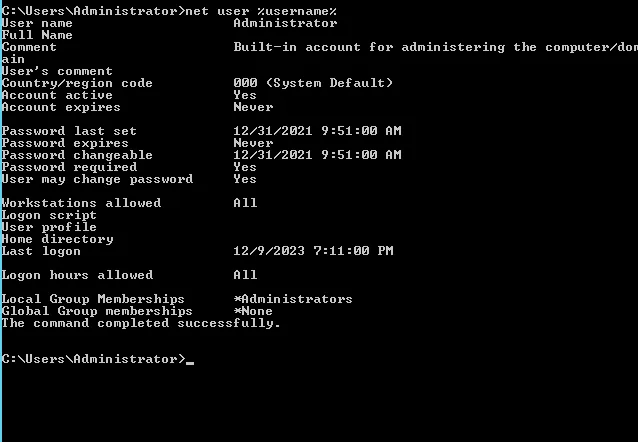
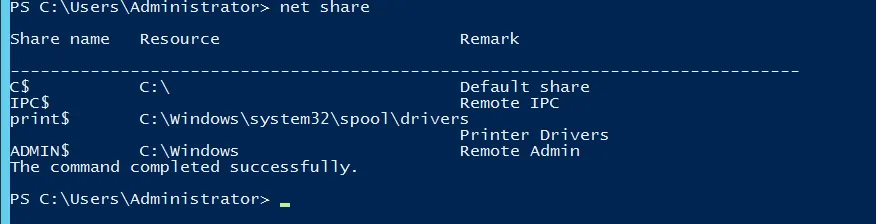
-
Network Shares
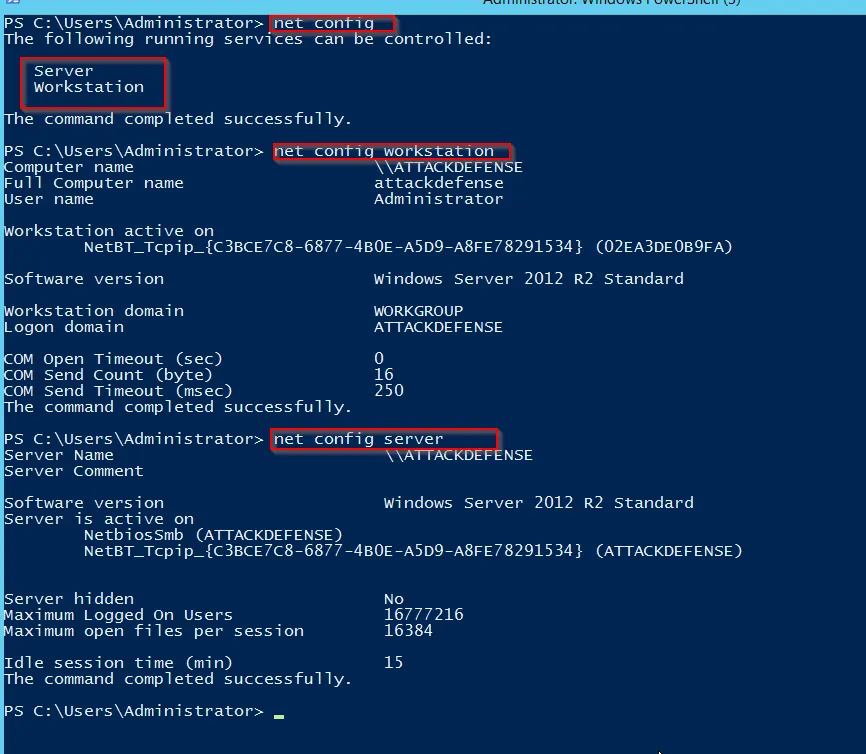
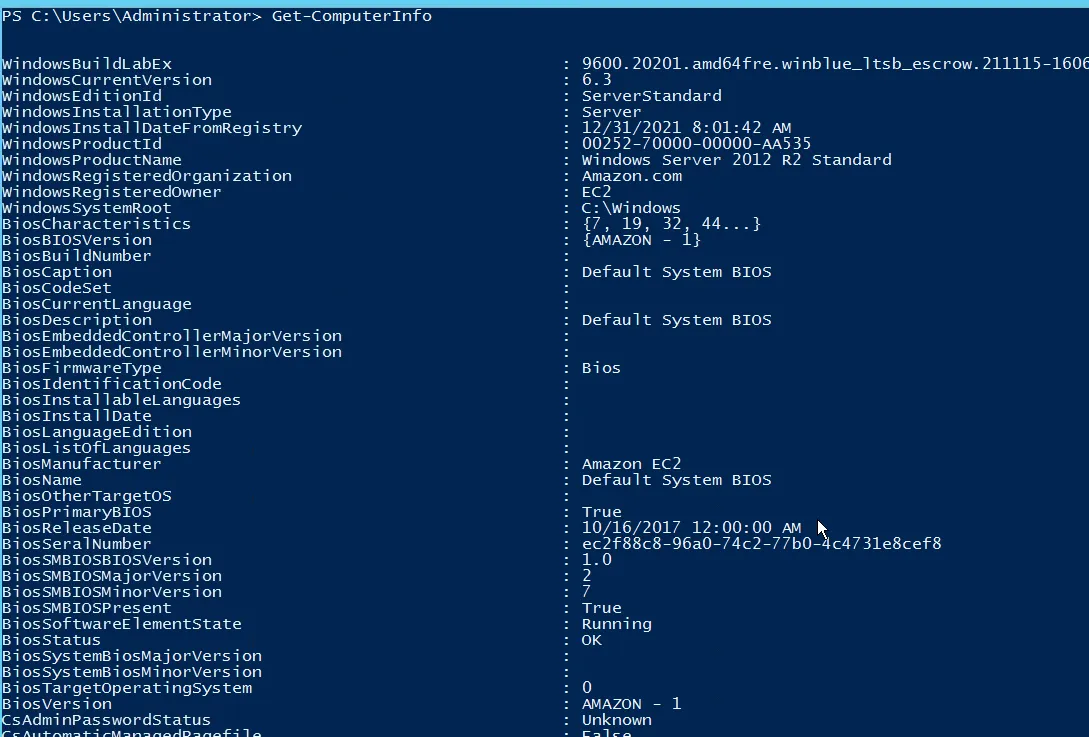
-
System Information

Task 2: Dumping the System’s Memory
For this task, let’s assume that we want to dump the system’s memory (make a copy) so we can perform memory forensic investigations later on. Use the FTK Imager tool to acquire the memory of the suspect’s machine.
Compare the size of the memory image and the size of the actual system’s memory, and make sure they match!
Make sure to use Capture Memory option from the FTK-Imager option

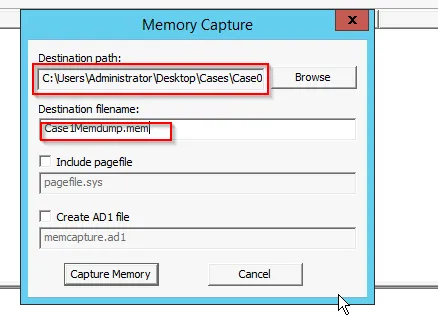
If we include pagefile and create AD1 file, then it will create both of the file.
Task 3: Creating a Custom Forensic Image
Important: You don’t need Task 2 to go to Task 3 or Task 4. Note that if you perform Task 2, then storage will be full. Before proceeding to Task 3, Reset the lab (Stop Button then Reset button) -> space is now freed -> go straight to Task 3 or Task 4. You don’t need Task 2 that will fill up the space.
In this task, we will continue to use AccessData’s FTK Imager to create an image file of specific system files to use for analysis. The custom image and files could be used to start the investigation process until a full system image comes through, if possible.
Let’s assume that the suspect’s system that we want to gather information from already has an external drive (ex: USB) containing all required tools plugged into it. In a real-life scenario, the only difference will be that you will be plugging in your own USB thumb drive and running FTK-Imager from there.
In this task, create a custom image and make sure you gather the following:
-
File System Files
To extract all the File systems which may be deleted, can be extract using “Add Evidence Tab” » Physical Drive
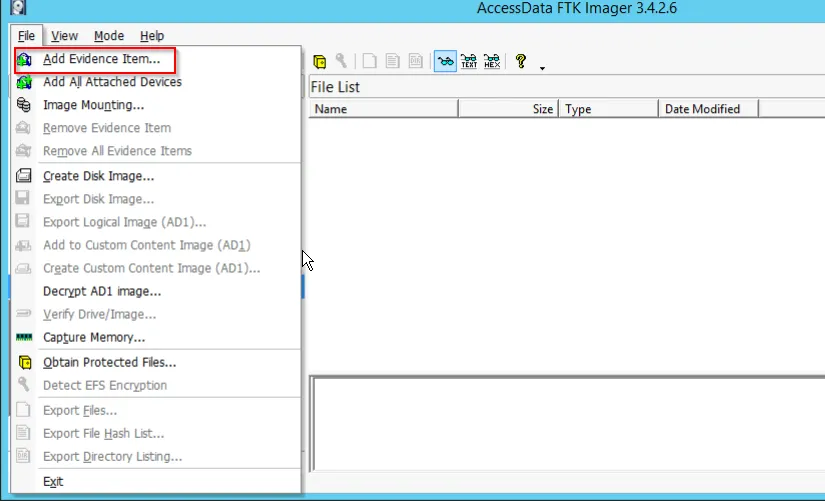
After selecting the option, we select the Physical Drive to extract all the files within the drive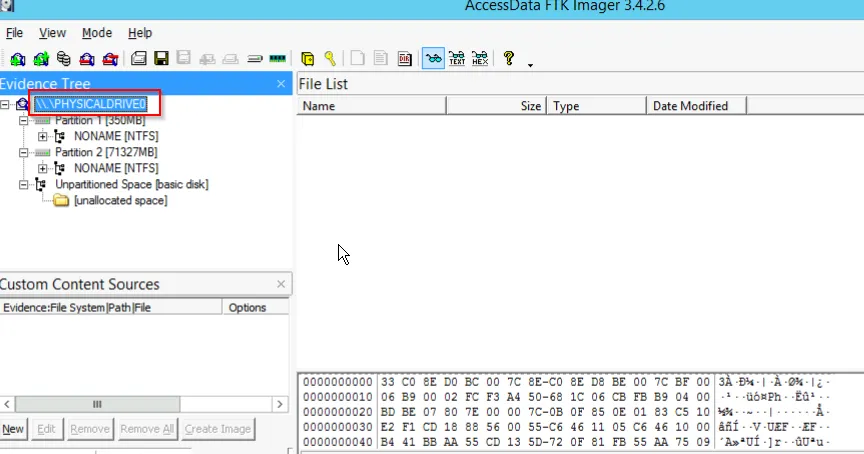
Since there are two partitions and we must aware that Windows uses the first partition to store the system files. Here we need to know few important system files, which are named as:
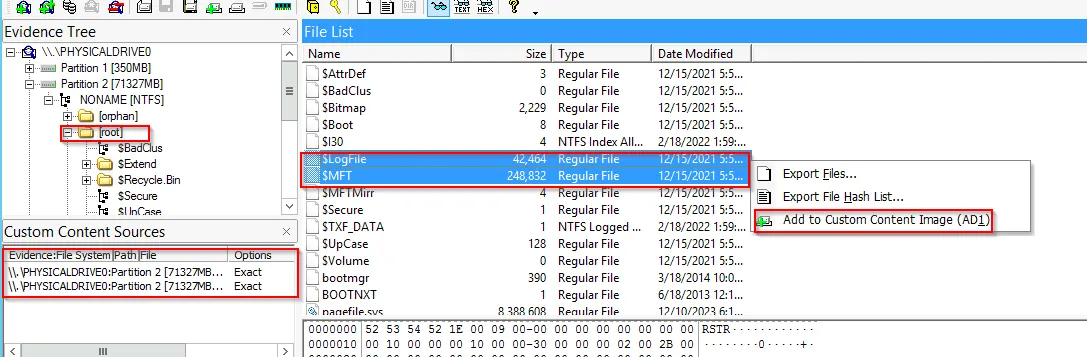
- $MFT :→ Master File Table (MFT) is the most important files in NTFS file system. It keeps the records of all files in a volume, the file’s location in the directory, the physical location in the directory, the physical location of the files in the drive, and file metadata. (For info: https://whereismydata.wordpress.com/2009/06/05/forensics-what-is-the-mft/)
- $LogFile :→ NTFS allows an operating system to maintain transaction record of all changes made to volume such as file creation, deletion, renaming, writing and moving; these transactions are stored in transaction log called $LogFile.
- $UsnJrnl :→ Update Sequence Number Journal (USNJRNL) file is a crucial component of the NTFS filesystem, as it allows the system to keep track of changes made to the drive and maintain data integrity. Without the $USNJRNL file, the system would be unable to properly recover from error or crashes, potentially leading to data loss or corruption. (For more info: https://asdfed.com/page-1756777)
The two files, $MFT and $LogFile can easily be extracted from [root] and add both to Custom Content Image (AD1)
 Another file $USNJRNL can be found within $Extend file path
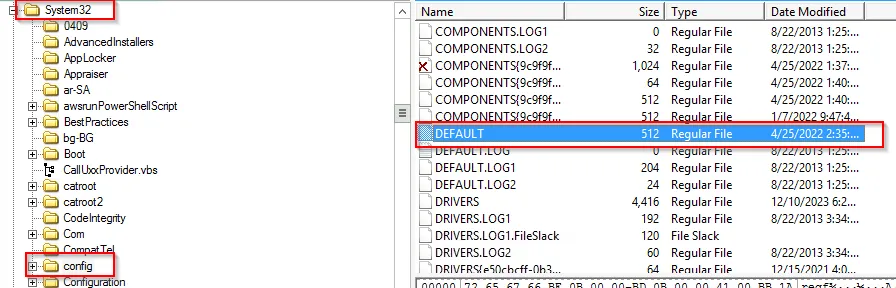
- Windows Registry Files
  a.  SAM
  b.  SYSTEM
  c.  SOFTWARE
  d.  SECURITY
  e.  DEFAULT
Further add above mentioned important system files from config located in (C:\Windows\System32\Config).
-
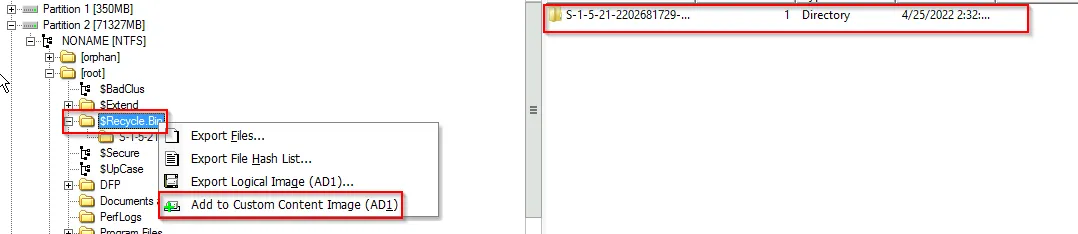
Recycle Bin Files
Select the $Recycle.Bin path and add the custom image
-
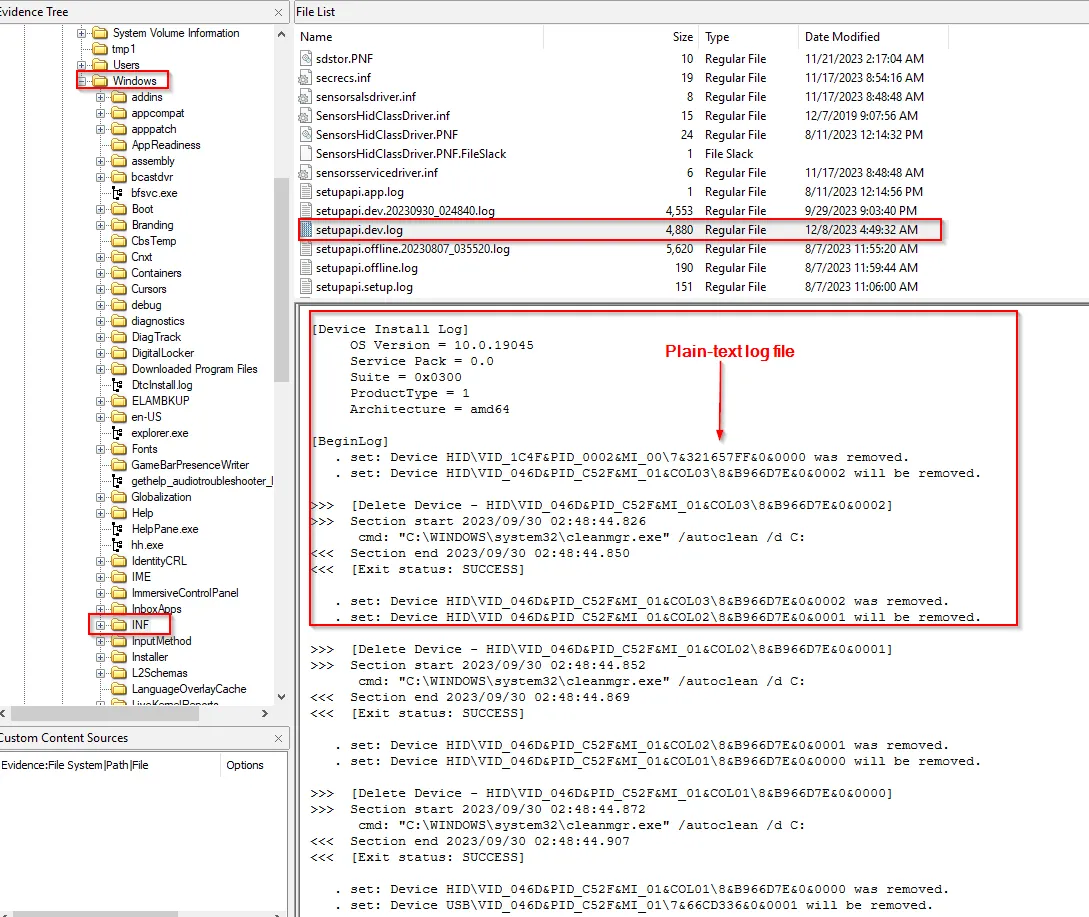
Log Files (evtx, log, etc.)
One of the important log file is the setupapi.dev.log (It logs the information about device installation in plain-text log file that you can use to verify the installation of a device and to troubleshoot device installation problems. If signing problem exists, SetupAPI will log information about the signing problem in the log file).
This file is located within Windows >INF
(Note: INF (Setup Information File) contains all the information that device installation components use to install a driver package on a device)
-
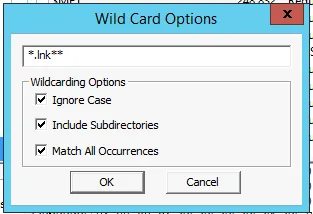
Link Files (.lnk)
There could be a lot of link files. So we can use the option of wildcard to extract and create a custom image for all exisiting link files. This can be done as:
First select New option from Custom Content Sources Panel

Now edit the * by adding the contents as:
Similarly, evtx files can also be added.
-
Cache Files (RecentFileCache.bcf)
The cache file is located within: C:\Windows\AppCombat\Programs\RecentFileCache.bcf [Can’t locate it on the Win10 machine]
-
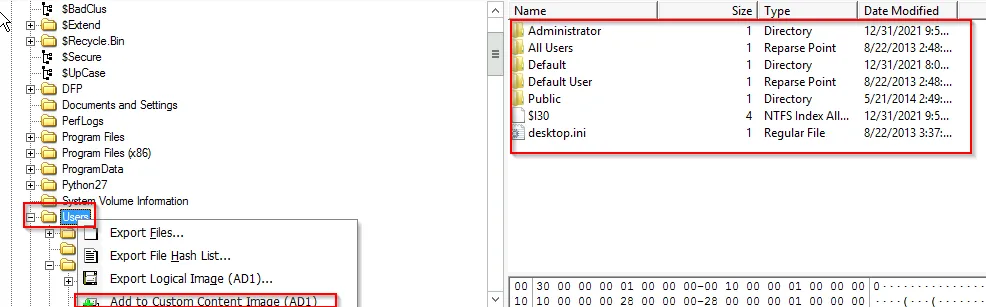
User Files
Navigate to C:\Users tab and create a custom image
-
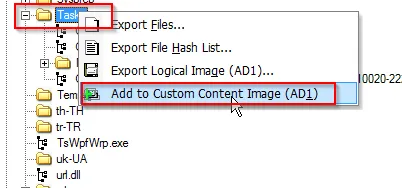
Task Files
Navigate to Windows » Tasks and creat a Custom Image
Finally, don’t forget to encrypt the data gathered.
Important: You shouldn't add the AdminELS user's directory to the image. He is the user that was given to you to do the investigation. No need to investigate this account. Consider it clean....
Now time to create an image for all the selected file evidence. To do this, select Image from Custom Content Source Pane
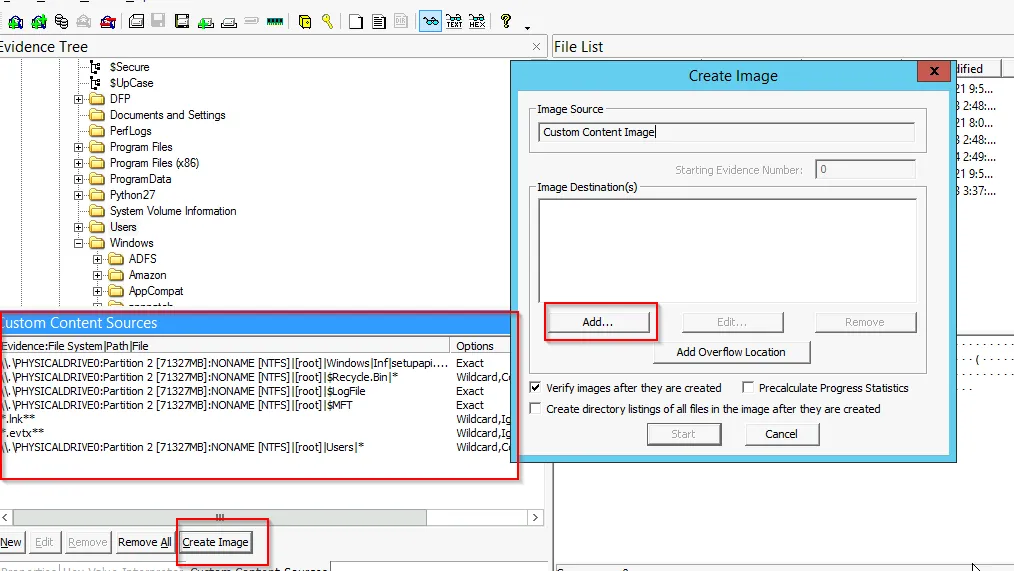
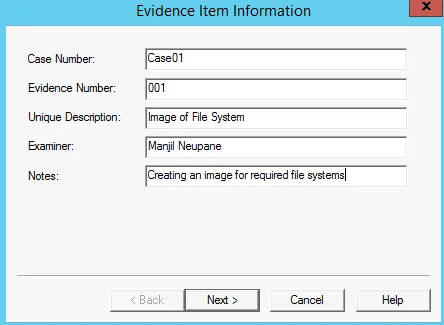
Now Add the evidence information for that image
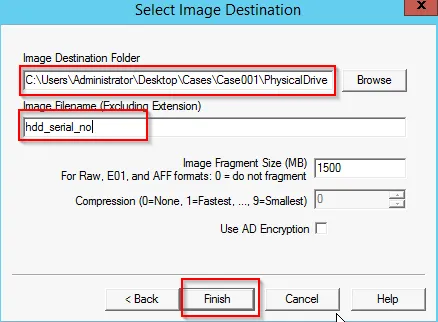
Further, Next select Image Destination
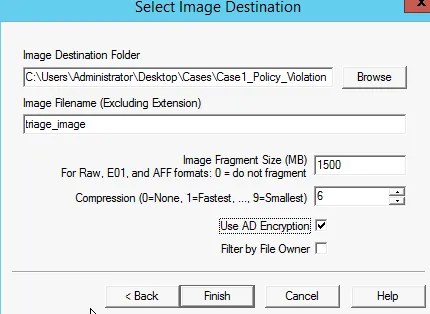
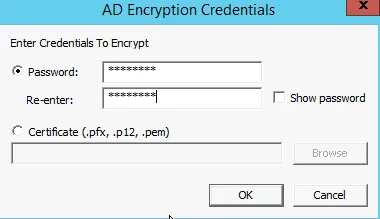
As we are asked to use AD encryption, then we further set the password.
Finally, set the directory listing of all files for created image.
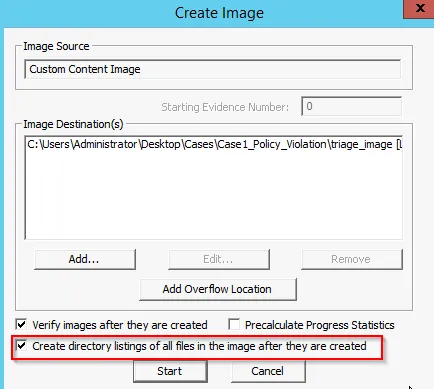
Now our image will be created:
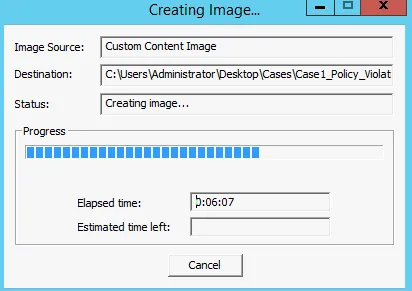
The result obtain as:
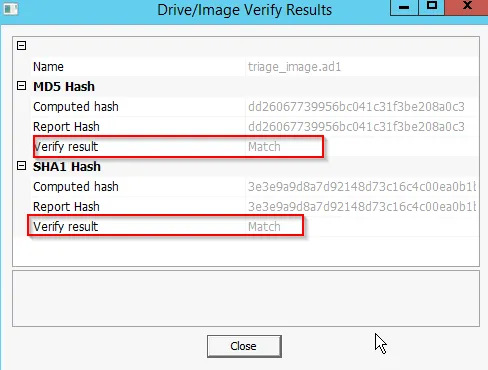
To view the file created for the image:
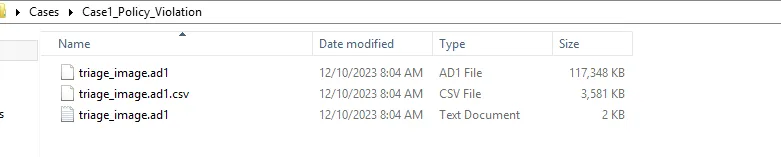
Further, doc file can be viewed as:

Also open the csv file using Excel to view all the contents
Task 4: Creating a Full System Image
In this task, we will be showing you how you could use AccessData’s FTK Imager to create a forensic image file of the entire hard disk drive. An image file is a bit-stream copy (forensic copy) of the source physical drive. Various forensic analysis suites can open and examine FTK Image Files like AccessData’s Forensic Toolkit, EnCase, Digital Forensics Framework, OSForensics, and Autopsy (more on this suite later) to only name a few.
Note: For performance reasons, you are not required to take a forensic image of the Win10 machine's C: drive; this would take hours to complete, and there is not enough space to save the forensic image. This task's purpose is to show you how you could take a forensic image of a machine's entire disk, in a step-by-step manner.
Make sure you understand the difference between this task and Task #3.
To create a full system image we can use Create Disk Image » Physical Drive » Raw (dd) » Evidence Item Information
Now your required image will be created:
 Now navigate to destination path and you will see two files (hdd_serial_no.001 and hdd_serial_no.001.txt (text file)) for the image will be created.
After completion
Now navigate to destination path and you will see two files (hdd_serial_no.001 and hdd_serial_no.001.txt (text file)) for the image will be created.
After completion


Task 5: Automated Live Response
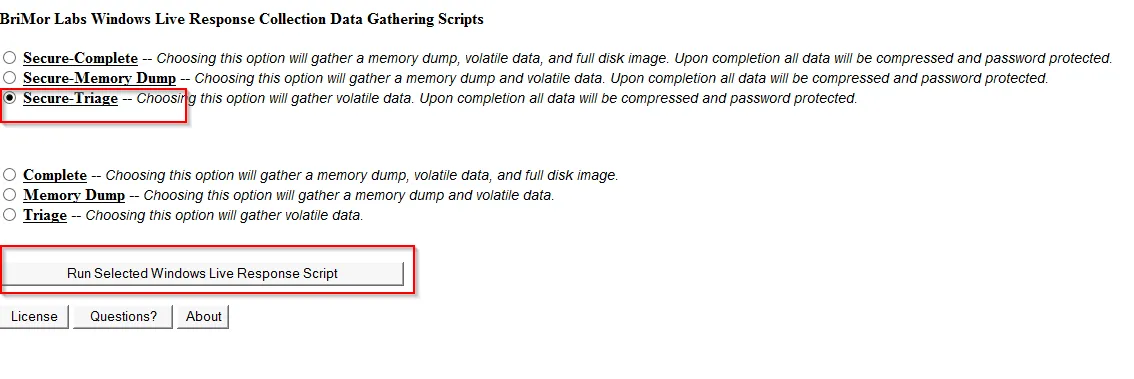
In this part of the lab, you are asked to use the BriMor Labs Windows Live Response Collection toolkit. One of the great benefits of using BriMor’s Windows Live Response toolkit is that even if you forgot to choose a specific artifact to acquire and add to your evidence image, the toolkit will acquire it automatically for you. The toolkit is being regularly updated with new tools and files to acquire. Use the toolkit to run a live acquisition of system and user artifacts securely.
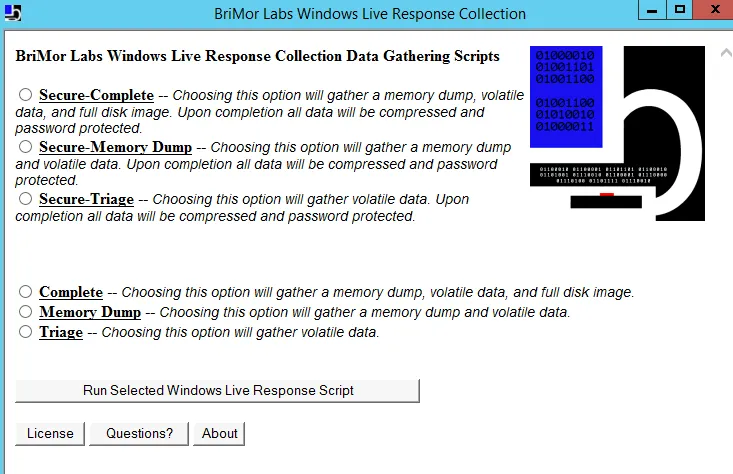
Now select the Secure Triage option and Run selected windows live response script
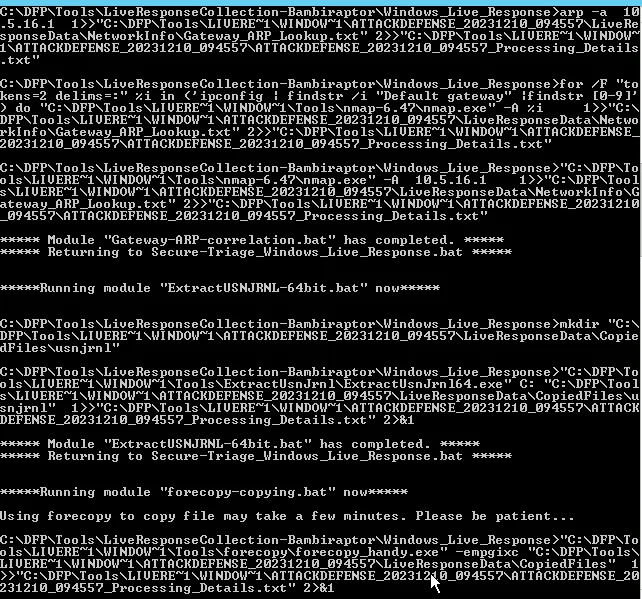
Now the CMD terminal will run few scripts and ask to press any key, which will finally generate a zip file. After accessing the zip file:
Final Response from the Bambiraptor, and Key is copied to Notepad

Now let’s extract all those 7z file. We need to open 7z within CMD , located at C:\DFP\Tools\LiveResponseCollection-Bambiraptor\Windows_Live_Response\Tools\7zip
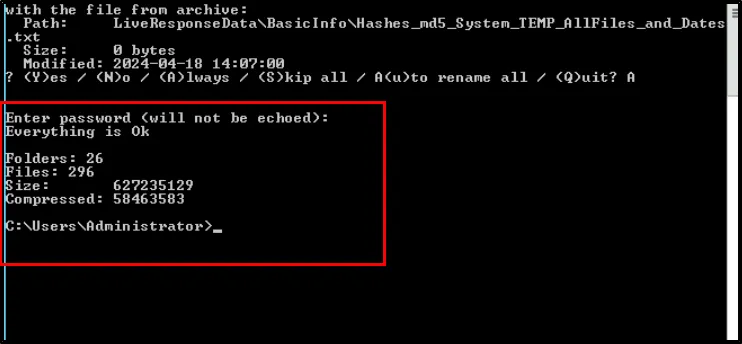
From the previous saved password, we can extract the compressed files. For my system, the output file is located at:
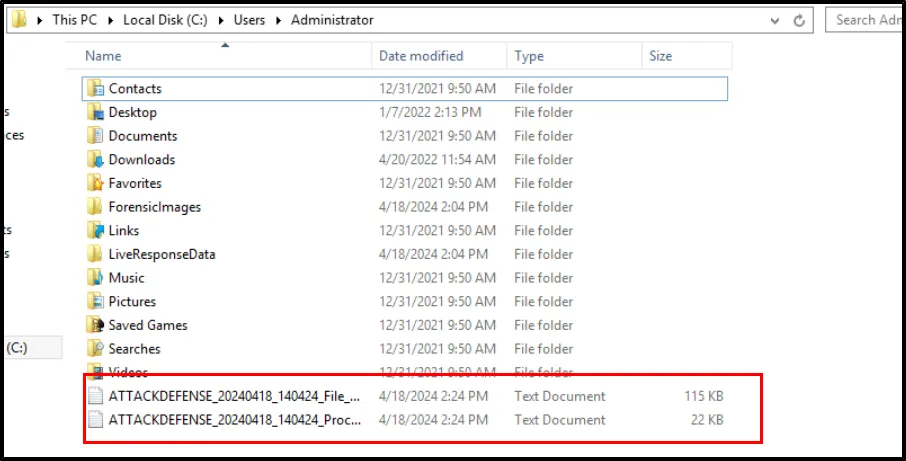
We can view the further information from this extracted files.